¶ APIs
- Create APIs
- Rename APIs
- Set up the Request Payload
- Globals and Dynamic Payload Values
- Call APIs
- Import APIs
- Organizing APIs into folders
- Copy APIs
- Remove APIs
- Remove Folders
- Export APIs
¶ Create APIs
- Open the API Manager page by clicking here or on the API Manager toolbar button on the home page.
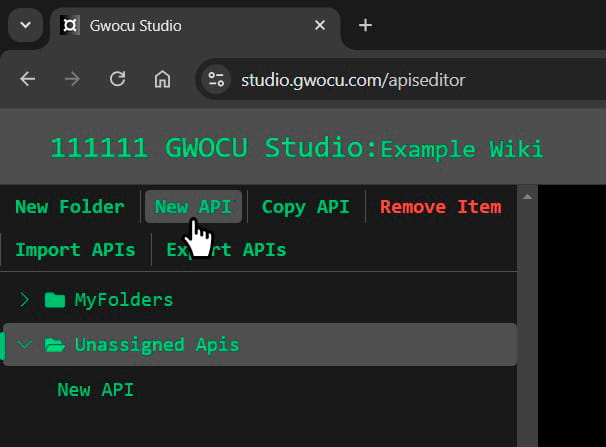
- Click on the New API toolbar button. An alert will confirm the new API has been created in the Unassigned APIs folder, where it will appear as the last item.
¶ Rename APIs
New APIs are assigned generic names by default. You can rename them to something more descriptive, but the name must be unique. There are 3 ways in which you can rename an API:
¶ Using the keyboard
- Click on the API you want to rename and press
F2. - Enter the new API name.
- Press
Enteror click outside the input field.
The updated name will appear in the API details panel.
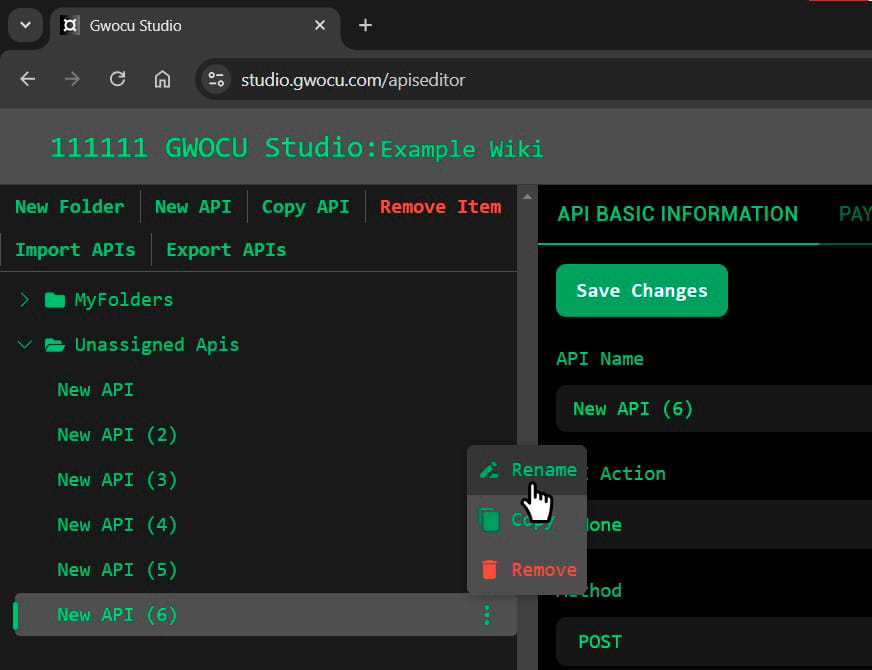
¶ Using the "More options" menu
- Hover over the API to reveal the More options button.
- Click the button to open the menu.
- Select Rename.
- Enter the new name.
- Press
Enteror click outside the input field.
The updated name will appear in the API details panel.
¶ Using the API details panel
- Click on the API you want to rename.
- Update the name in the API details panel.
- Click Save Changes in the top-left corner.
The updated name will appear in the tree view.
¶ Set up the Request Payload
¶ API Basic Information Tab
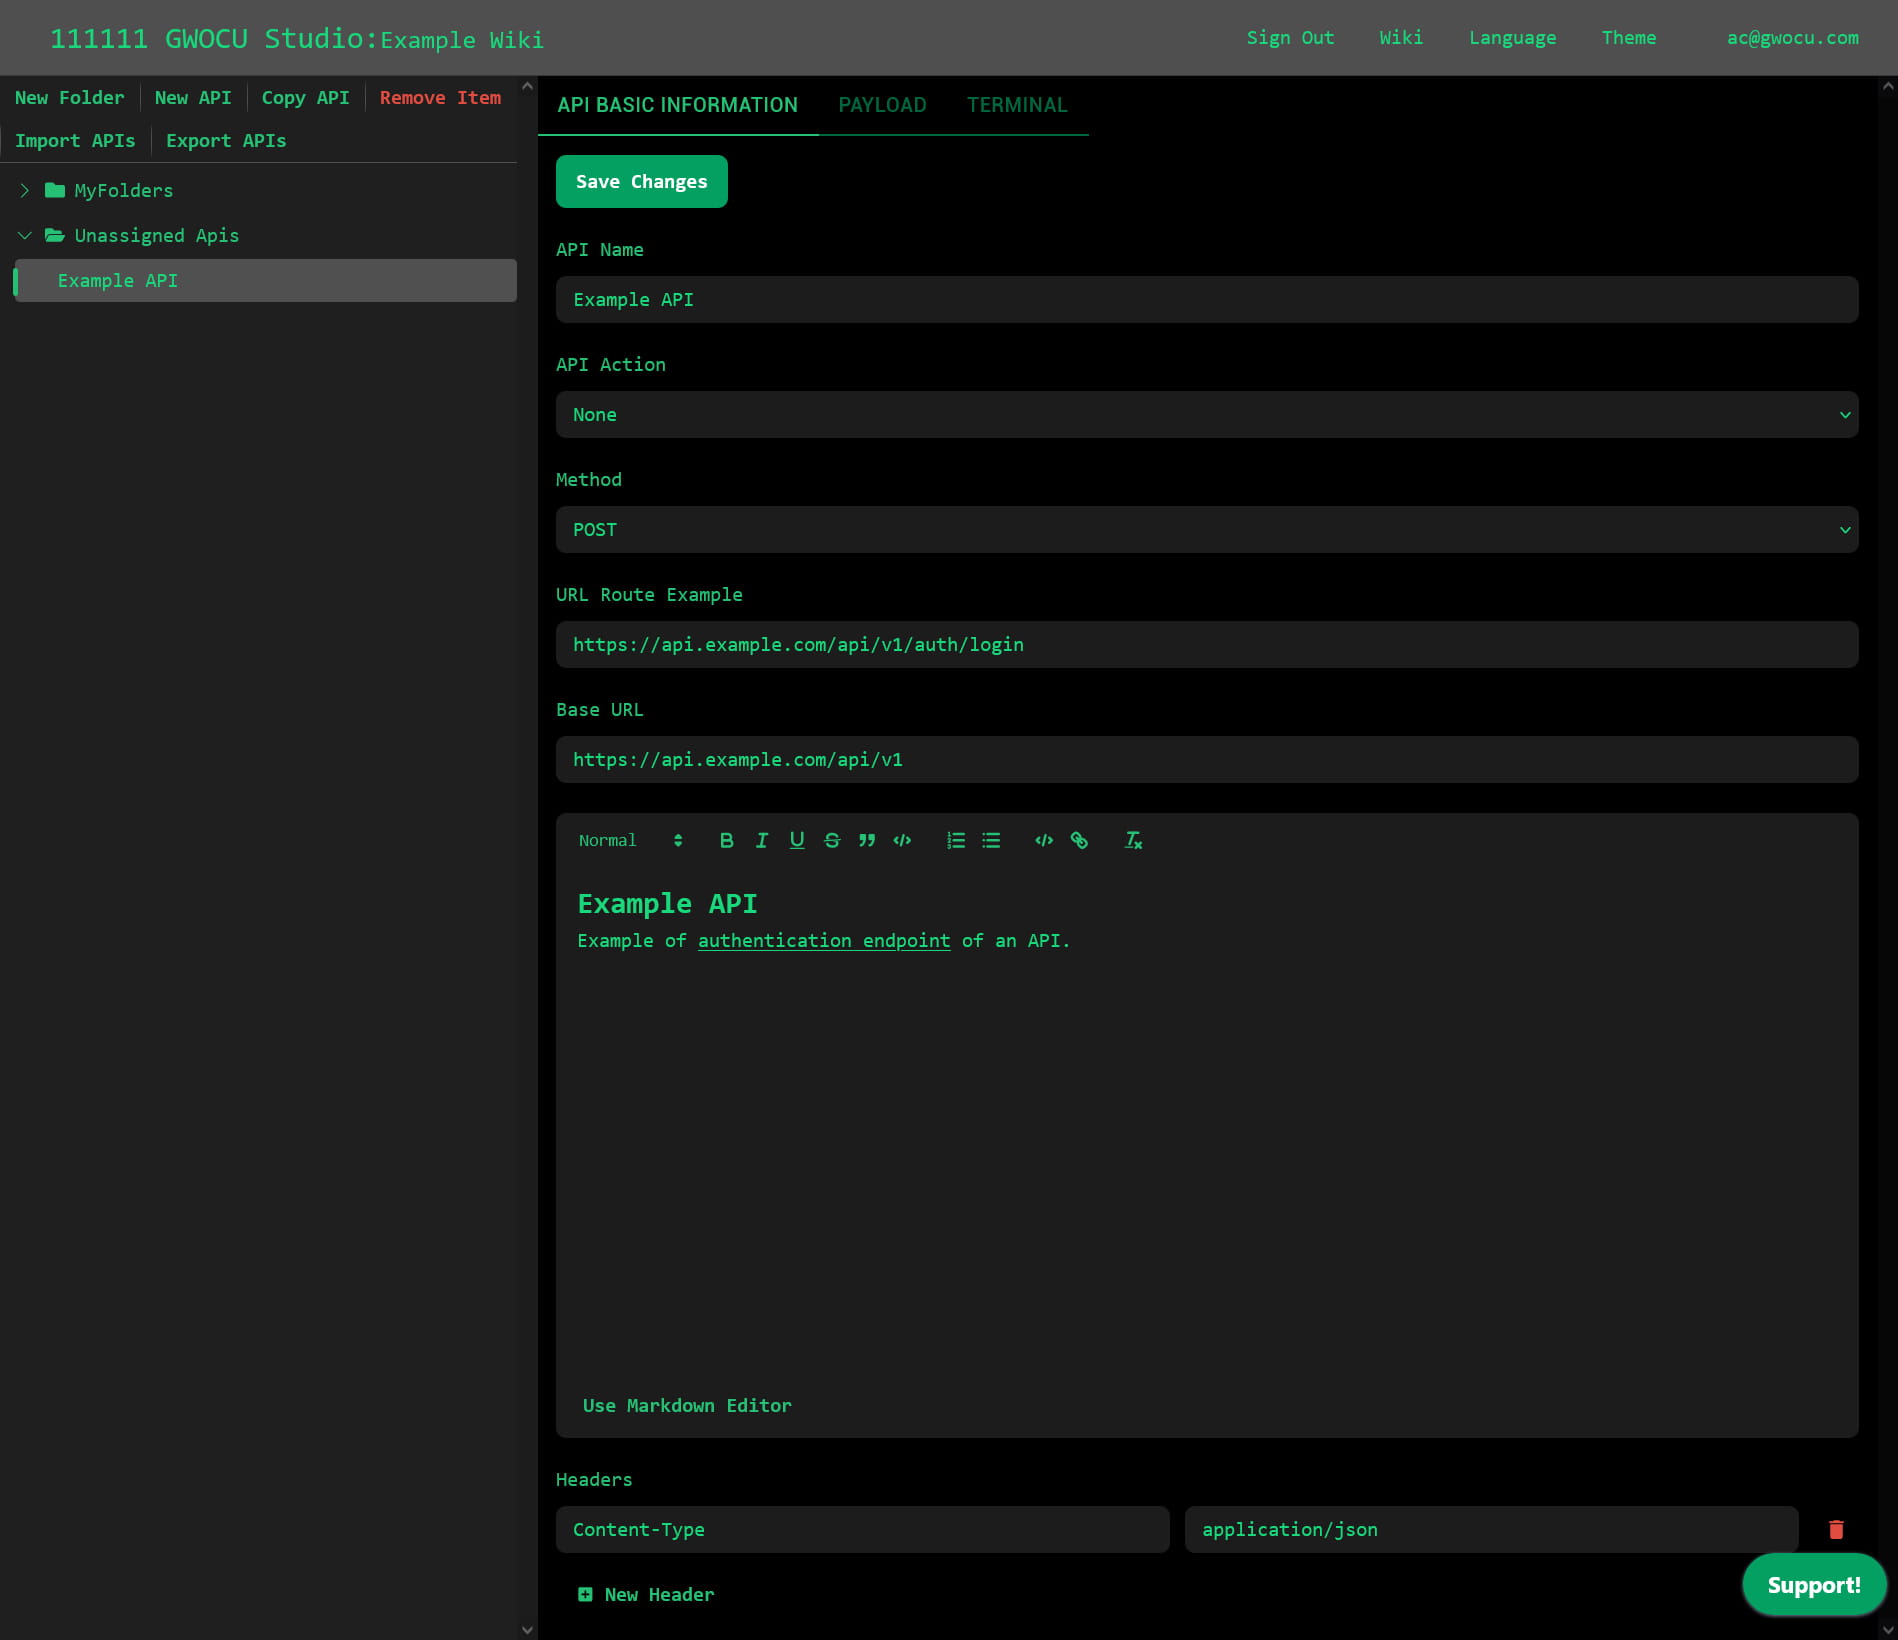
From the API BASIC INFORMATION tab in the API details panel you can set the:
- HTTP Request Method: choose among POST, GET, PUT, DELETE, HEAD, OPTIONS.
- HTTP Headers: Click the Add header button at the bottom of the panel. A row with inputs for the key and value will appear above the button. Use the trash icon at the end of a row to delete a header.
- URL: If your API URL contains dynamic segments, use the following as a guide:
- Original URL:
https://api.example.com/api/v1/users/:userId, where:userIdis a variable segment. - Example URL Route:
https://api.example.com/api/v1/users/1(replace:userIdwith a specific value). - Base URL:
https://api.example.com/api/v1(use this ifv1is the only API version you'll interact with).
- Original URL:
- Description: A brief text description of the API. You can format the text using Markdown or rich text.
Make sure to click on the Save Changes button to persist your modifications.
¶ Payload Tab
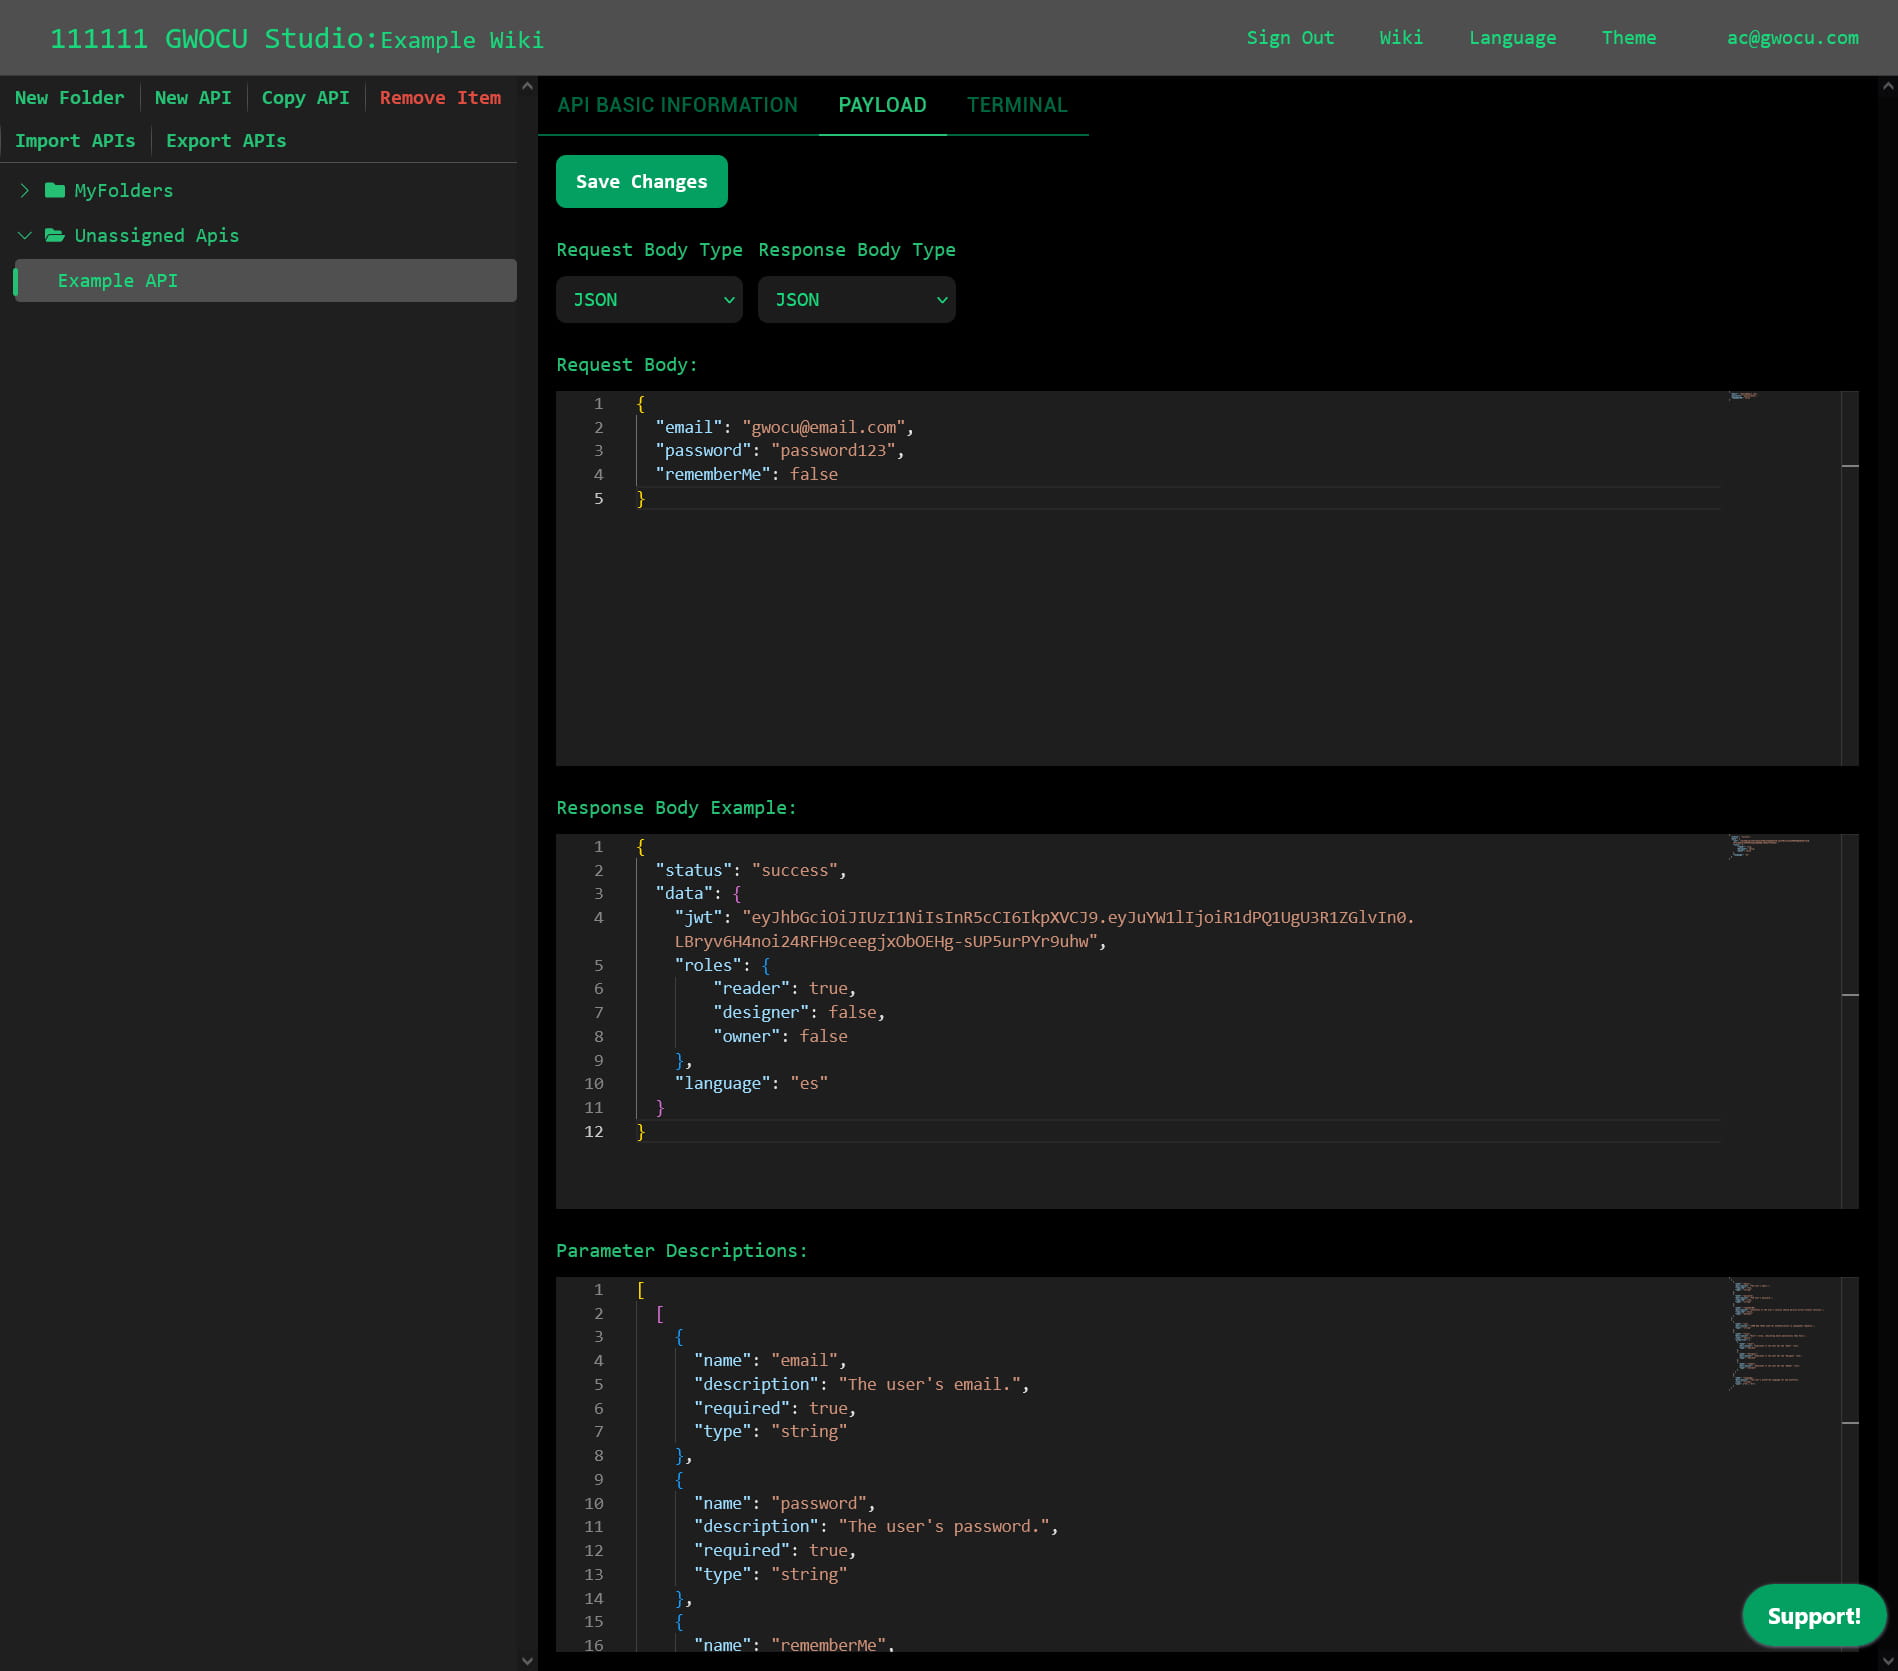
All the values configured in the PAYLOAD tab are included in the documentation generated by the platform. However, only the Request Body is sent with the actual request. Configure the following in this tab:
- Request and Response Body Types: choose between JSON and RAW text.
- Request Body: the content sent in your request body.
- Response Body Example: a sample response returned by the endpoint.
- Parameter Descriptions: An array containing two arrays: one with descriptions of the request body parameters and another with descriptions of the response body parameters.
For example, this request body:
{
  "email": "gwocu@email.com",
  "password": "password123",
  "rememberMe": false
}
And corresponding response body:
{
  "status": "success",
  "data": {
    "jwt": "eyJhbGciOiJIUzI1NiIsInR5cCI6IkpXVCJ9.eyJuYW1lIjoiR1dPQ1UgU3R1ZGlvIn0.LBryv6H4noi24RFH9ceegjx0bOEHg-sUP5urPYr9uhw",
    "roles": {
      "reader": true,
      "designer": false,
      "owner": false
    },
    "language": "es"
  }
}
Would have this Parameter Descriptions input:
[
  [
    {
      "name": "email",
      "description": "The user's email.",
      "required": true,
      "type": "string"
    },
    {
      "name": "password",
      "description": "The user's password.",
      "required": true,
      "type": "string"
    },
    {
      "name": "rememberMe",
      "description": "Indicates if the user's session should persist across browser sessions.",
      "required": false,
      "type": "boolean"
    }
  ],
  [
    {
      "name": "jwt",
      "description": "JSON Web Token used for authentication in subsequent requests.",
      "type": "string"
    },
    {
      "name": "roles",
      "description": "User's roles, indicating which permissions they have.",
      "type": "object",
      "properties": [
        {
          "name": "owner",
          "description": "Indicates if the user has the 'Owner' role",
          "type": "boolean"
        },
        {
          "name": "designer",
          "description": "Indicates if the user has the 'Designer' role",
          "type": "boolean"
        },
        {
          "name": "reader",
          "description": "Indicates if the user has the 'Reader' role",
          "type": "boolean"
        }
      ]
    },
    {
      "name": "language",
      "description": "The user's preferred language for the platform",
      "type": "string",
      "enum": ["en", "es"]
    }
  ]
]
¶ Globals and Dynamic Payload Values
There are 2 ways in which you can inject values dynamically in your requests:
- Actions: execute scripts before making requests, set or reuse global constants and calculated values across multiple APIs.
- Links in a workflow: inject values from one request's response into another request within a workflow.
¶ Workspace and API Actions
Use workspace actions to define global values or scripts for all APIs in a workspace. Use API actions to override these settings or apply new ones to individual APIs.
¶ Action Configuration Files
Workspace and API actions are defined using the same YAML structure. In your configuration file you must set a value for the type of authentication you'll use and you can choose to set globals or define JavaScript scripts to set the headers or the body of your request. We'll break down how to do each below.
¶ Authentication Type
The platform supports 3 authentication strategies out of the box: No Authentication, Basic Authentication, and Digital Signature. You can also manually implement other strategies.
¶ No Authentication
If no authentication is required or if you prefer to manually implement your own authentication strategy, use:
Authentication-Type: No-Authentication
¶ Basic Authentication
To authenticate with a username and password, use:
Authentication-Type: Basic-Authentication

Basic-Authentication:
  username: <your-username>
  password: <your-password>
  overwrite: yes # Possible values: yes, no.
- If
overwriteis set toyesand anAuthorizationheader is configured in the API Details panel, the value from the action configuration file will be used instead.
¶ Digital Signature
Use JavaScript scripts to calculate and inject a digital signature in your payload.
Authentication-Type: Digital-Signature

Digital-Signature:
  location: requestBody # Possible values: requestBody or Header
  parameterName: <keyNameInPayload>
  overwrite: yes # Possible values: yes, no.
  token: <yourToken>
  calculationFunction: function sortObject(payloadObj) {
    return Object.keys(payloadObj).sort().reduce(function (result, key) {
    result[key] = payloadObj[key];
    return result;
    }, {});
    }

    const apiTokenHashValue = crypto.MD5(token).toString();
    const sortedParameters = sortObject(parameters);

    let sortedKeyValuePairs = '';
    for (const [key, value] of Object.entries(sortedParameters)) {
    sortedKeyValuePairs += key + '=' + value + '&';
    }

    sortedKeyValuePairs += apiTokenHashValue;
    return crypto.MD5(sortedKeyValuePairs).toString();
- If
locationis set torequestBody, the payload object used in thecalculationFunctionwill be the request body. Iflocationis set toHeader, thepayloadobject will be the headers. - If
overwriteis set toyes, and a<keyNameInPayload>is set in the chosen payload (either request body or header), the value used will the one defined in the action configuration file.
¶ Other Authentication Strategies
You can implement other authentication strategies by configuring headers or request body settings as needed.
¶ Header Scoped Settings
Enable and set globals on the headers of your requests using the following configuration:
Global-Parameters-Header:
  enable: yes # Possible values: yes, no.
  parameters:
    <yourHeaderConstantKey>: <yourHeaderConstantValue>
    <yourHeaderVariableKey>: |
    {
      return getSomeCalculatedValue();
    }
  overwrite: yes # Possible values: yes, no.
- If
enableis set toyes, the defined headers will be included in the requests targeted by the action. - If
overwriteis set toyes, and a<yourHeaderKey>header is set for your API, the header value used in the request will be the one defined in the action configuration. - Use a pipe (
|) to define JavaScript functions that calculate values to inject into your headers.
Here's an example of how you could implement JWT-based authentication with an action:
Authentication-Type: No-Authentication

Global-Parameters-Header:
  enable: yes
  parameters:
    Authorization: Bearer eyJhbGciOiJIUzI1NiIsInR5cCI6IkpXVCJ9.eyJuYW1lIjoiR1dPQ1UgU3R1ZGlvIn0.LBryv6H4noi24RFH9ceegjx0bOEHg-sUP5urPYr9uhw
  overwrite: yes
¶ Request Body Scoped Settings
To inject values into the request body, you must use enable in combination with overwrite or addIfMissing.
Global-Parameters-RequestBody:
  enable: yes # Possible values: yes, no.
  parameters:
    <yourRequestBodyConstantKey>: <yourRequestBodyValue>
    <yourRequestBodyVariableKey>: |
      {
      return getSomeCalculatedValue();
      }
  overwrite: yes # Possible values: yes, no.
  addIfMissing: no # Possible values: yes, no.
- Setting both
enableandoverwritetoyeswill replace the values of the defined parameters if they are found in the request body. - Setting both
enableandaddIfMissingtoyeswill add the defined parameters if they are not found in the request body. - Setting
enabletonowill prevent any parameters from being replaced or added, regardless of theoverwriteoraddIfMissingsettings. - Use a pipe (
|) to define JavaScript functions that help you calculate values to inject in your request body.
Here's an example of the effect of each combination when injecting a timestamp value in the request body of an API using an action.
¶ enable and overwrite
If we apply this configuration:
Global-Parameters-RequestBody:
  enable: yes
  parameters:
    timestamp: |
      {
      const currentDateTime = new Date();
      return currentDateTime.toISOString();
      }
  overwrite: yes
  addIfMissing: no
To an API with this request body:
{
  "timestamp": "anyValue"
}
The resulting request body will be:
{
  "timestamp": "2025-01-17T20:34:54.644Z"
}
¶ enable and addIfMissing
If we apply this configuration:
Global-Parameters-RequestBody:
  enable: yes
  parameters:
    timestamp: |
      {
      const currentDateTime = new Date();
      return currentDateTime.toISOString();
      }
  overwrite: no
  addIfMissing: yes
To an API with this request body:
{}
The resulting request body will be:
{
  "timestamp": "2025-01-17T20:34:54.644Z"
}
¶ Best practices when injecting dynamic values
Even if a parameter will be dynamically replaced or added, it's a good practice to explicitly declare all the parameters you expect to use in your request body. Use double curly braces to indicate dynamically injected values, like this:
{
  "timestamp": "{{timestamp}}"
}
¶ Defining and Applying Workspace Actions
To create a Workspace Action, go to the home page, open the main menu and navigate to Actions & Webhooks > Workspace Actions.

This modal will pop up in your screen:
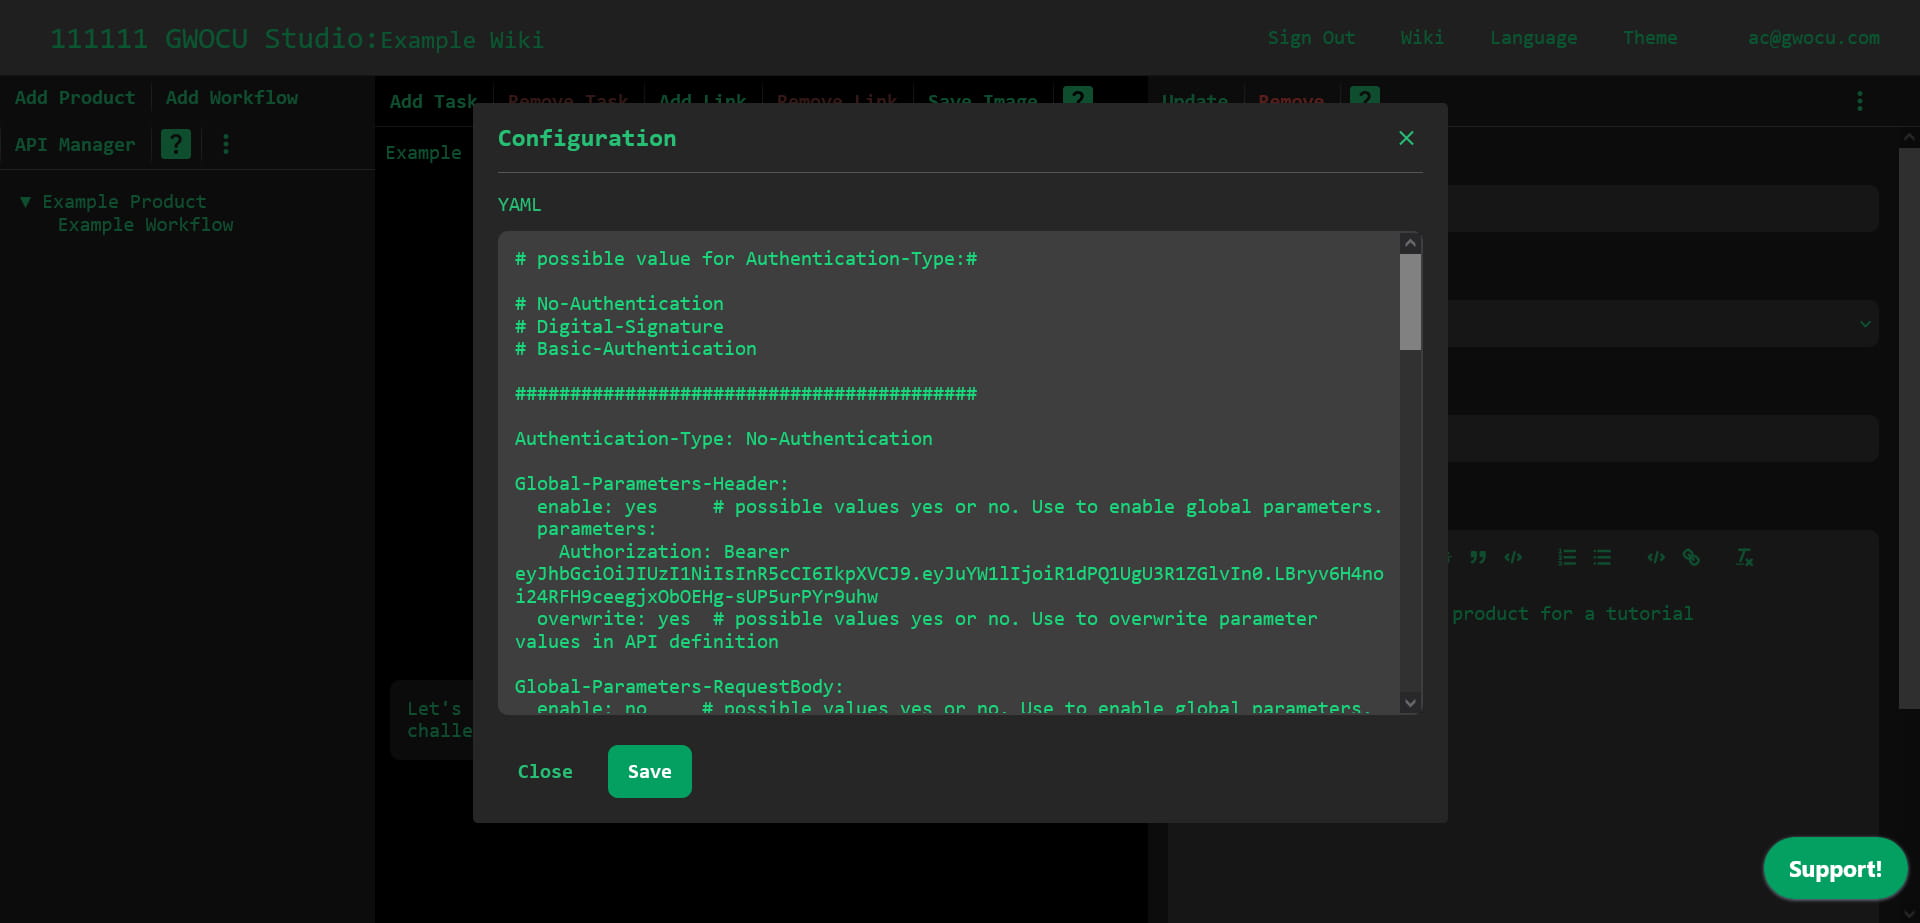
Since a workspace action is applied to all APIs in a workspace, you can only have one workspace action per workspace.
The YAML field contains a default template to guide you in writing your configuration file.
Once you're done, make sure your YAML configuration is valid and click the Save button to apply your changes.
¶ Defining API Actions
To create an API Action, go to the home page, open the main menu and navigate to Actions & Webhooks > API Actions.

This modal will pop up in your screen:
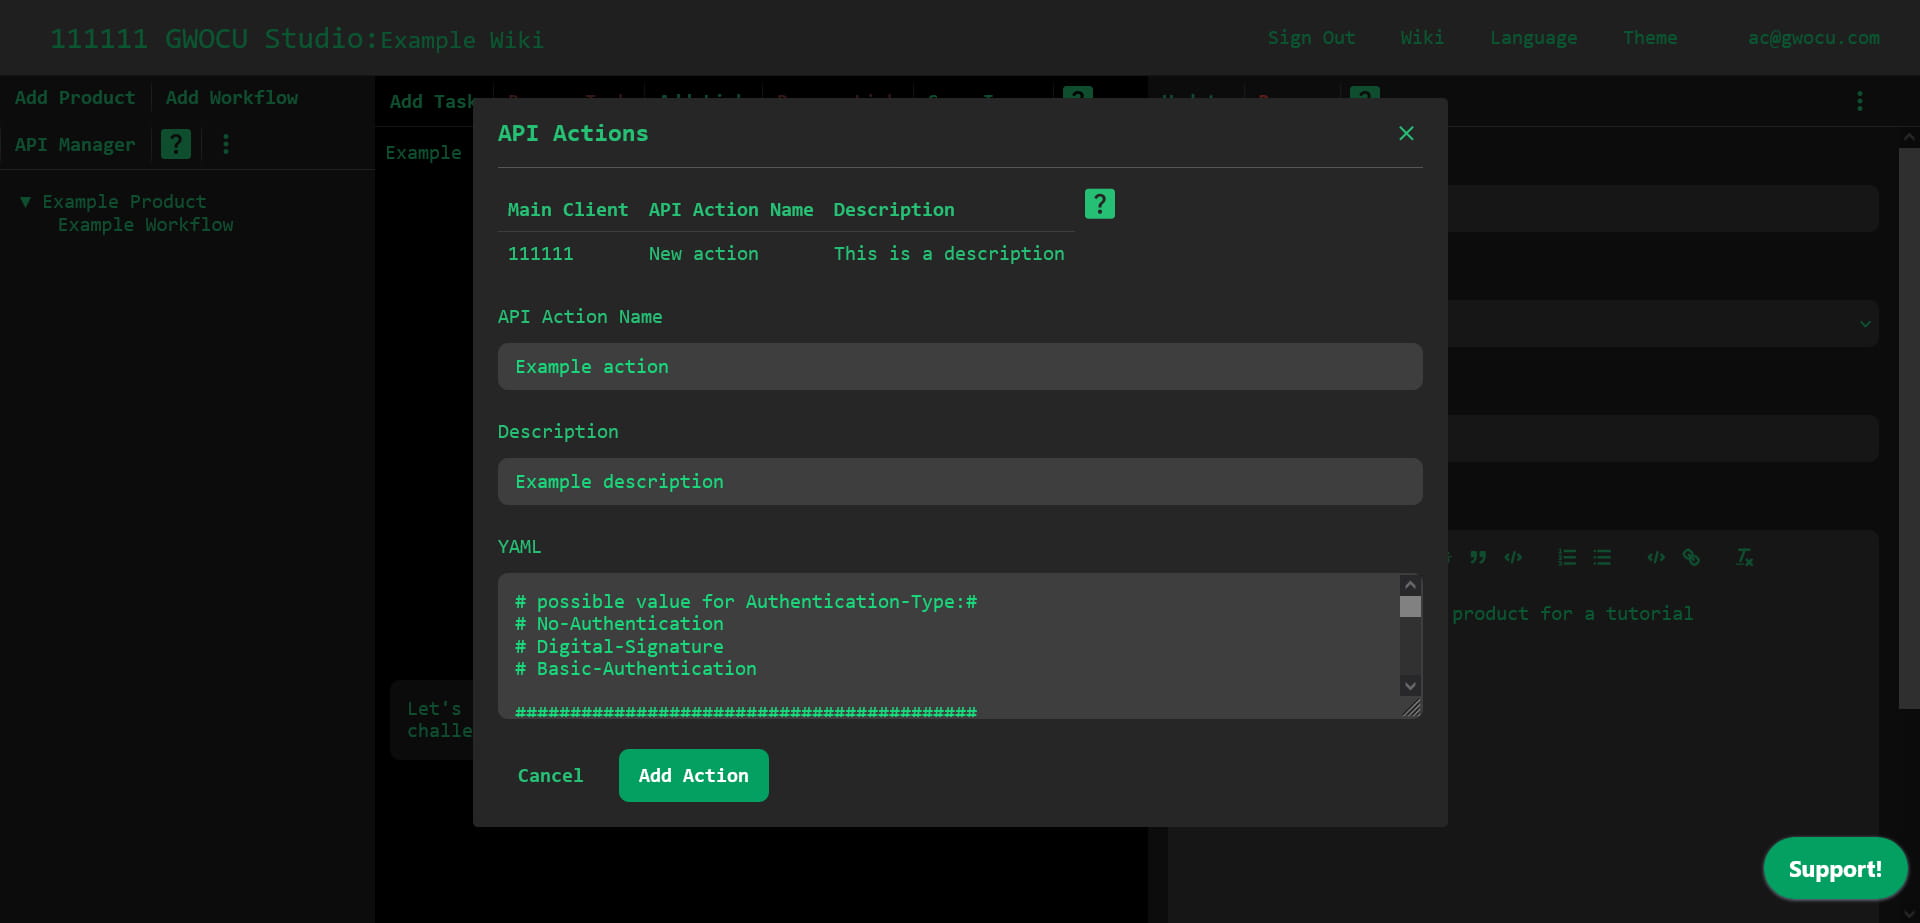
Unlike Workspace Actions, API actions are scoped to individual APIs, allowing multiple actions within the same workspace.
You must assign them a unique name to identify them. You can't change an API action name, but you can always reuse their configuration to create a new one. Optionally, you can add a description to clarify its purpose.
The YAML field contains a default template to guide you in writing your configuration file. Once you're done, make sure your configuration is in valid YAML format and click the Add action button to save the action.
To view or edit the details of an API action, click its row in the table. Click again to unselect it.
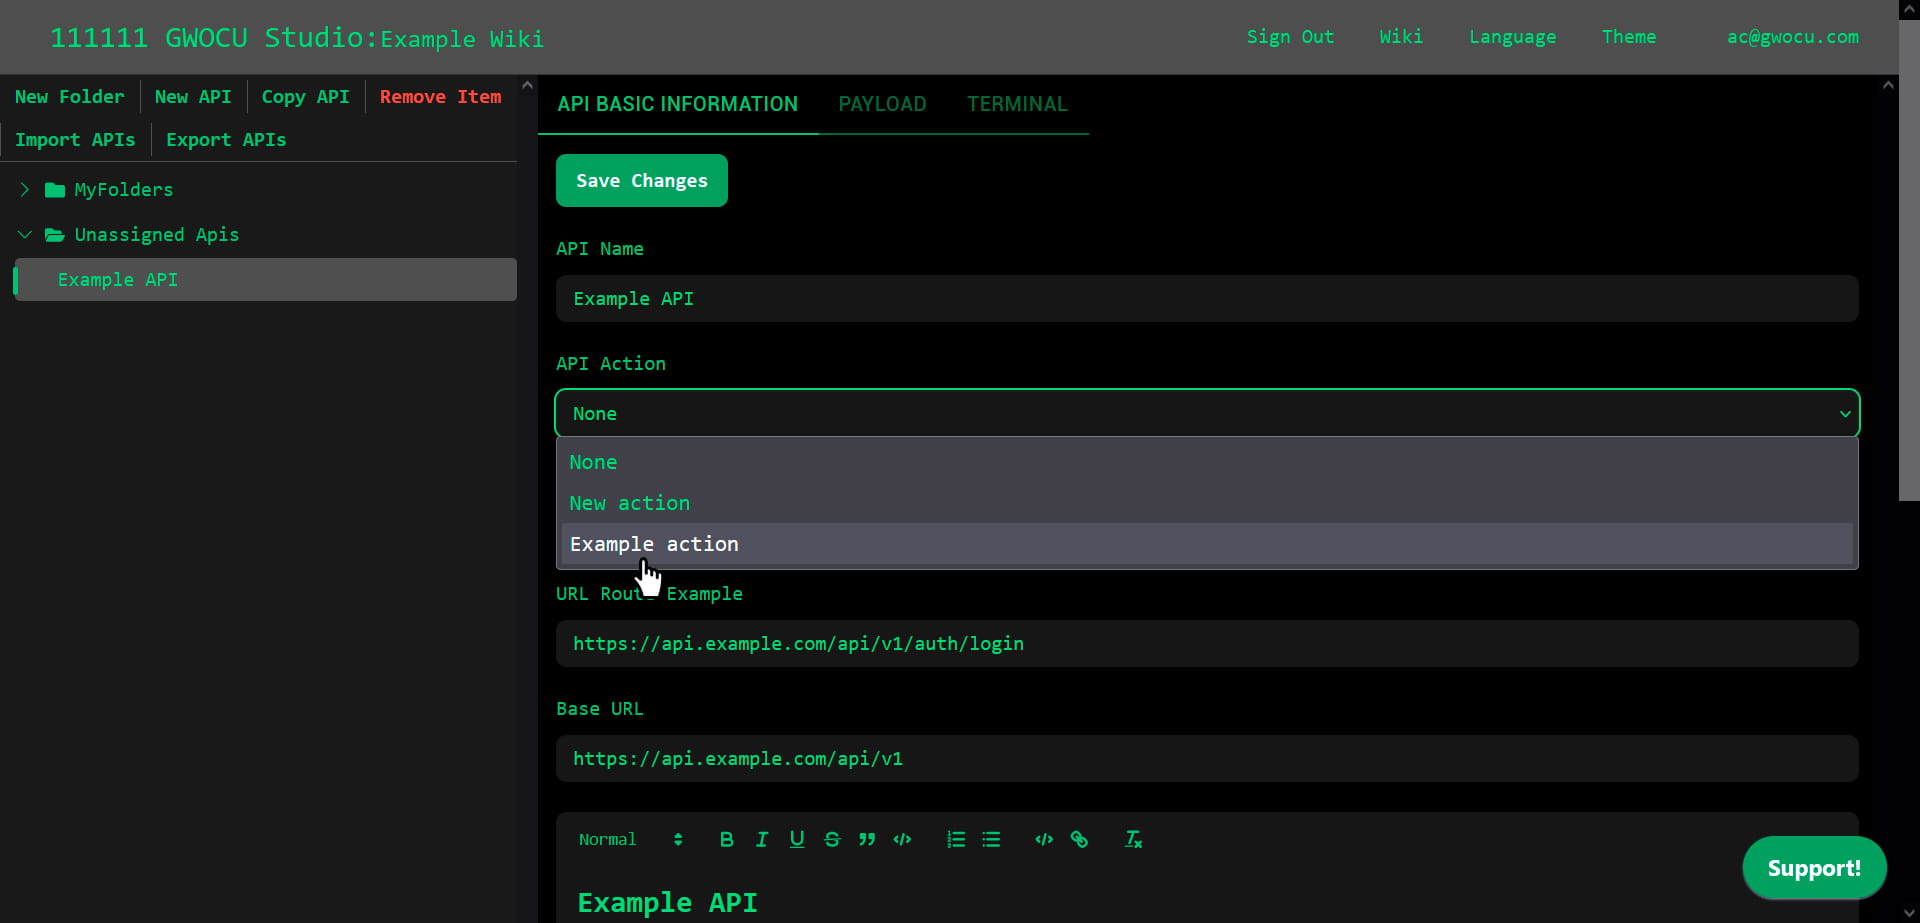
¶ Applying API Actions
To apply an API action on an API:
- Open the API Manager page by clicking here or on the API Manager toolbar button on the home page.
- Click on the target API in the tree view.
- Choose the API Action name in the API Action field.
- Click on the Save changes button.
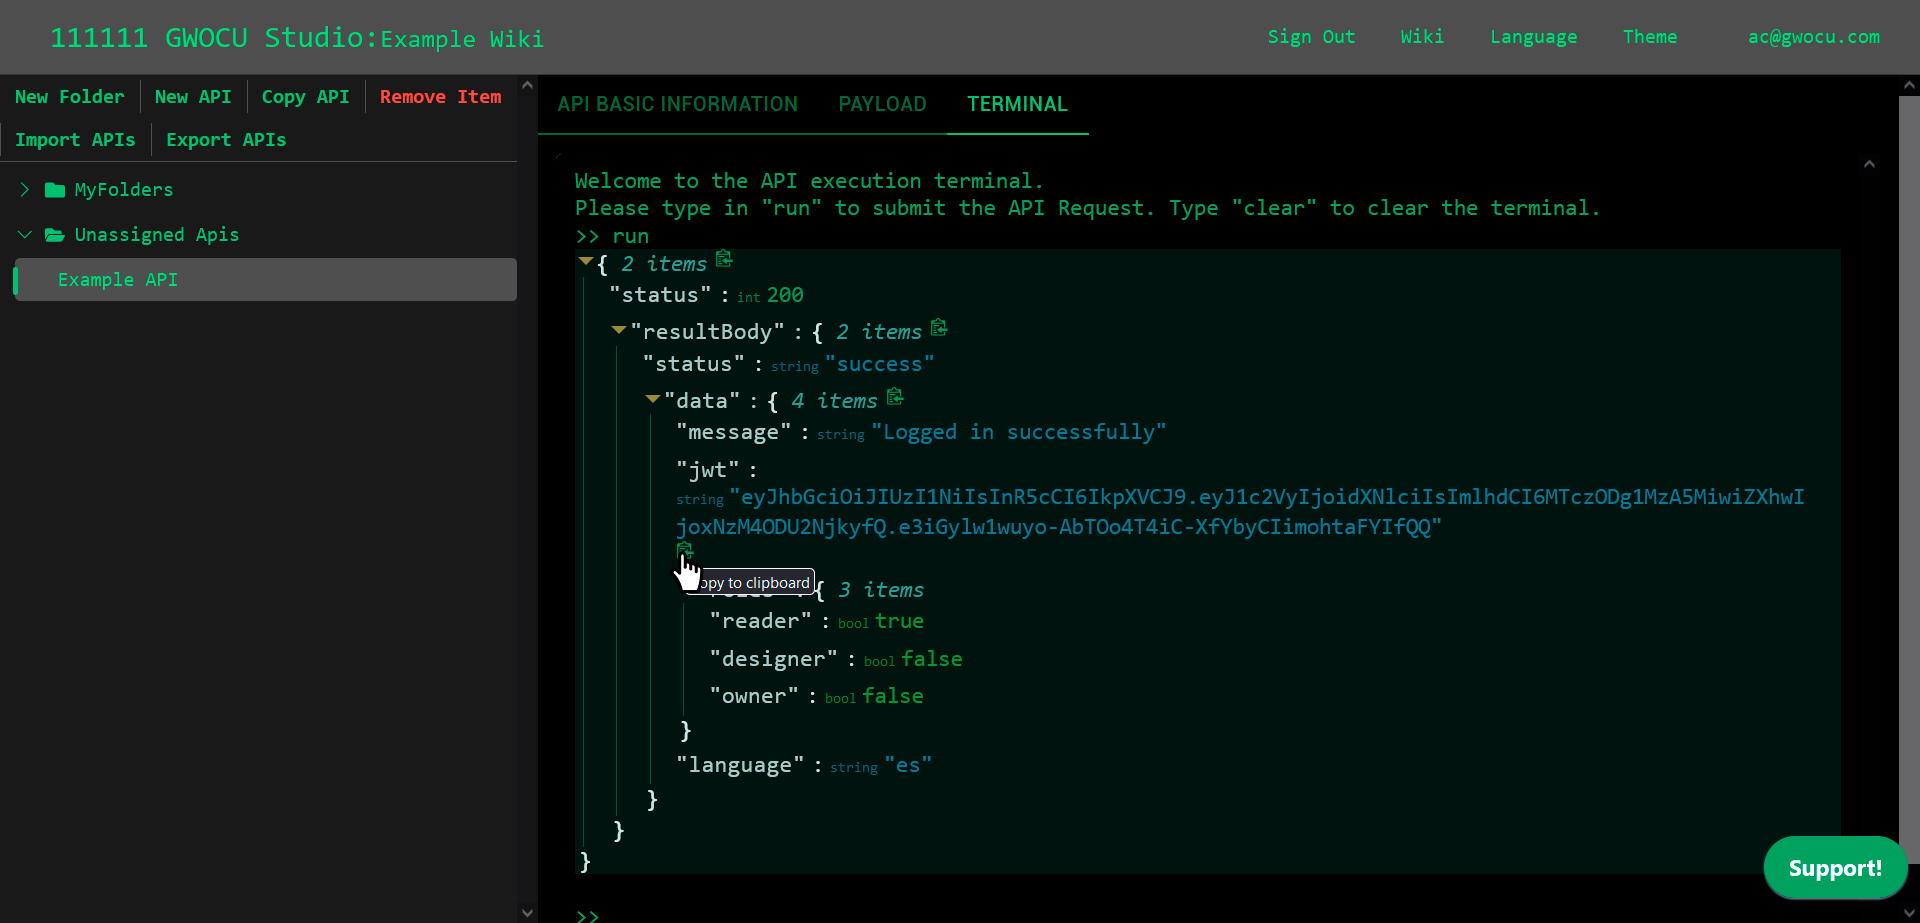
¶ Call APIs
To call an API, use the run command in the terminal interface of the TERMINAL tab within the API details panel.
The response will be displayed as a JSON object containing both the status and the response body. You can hover over a parameter or its value to reveal the Copy to clipboard button.
Use the clear command to reset the terminal interface.
¶ Import APIs
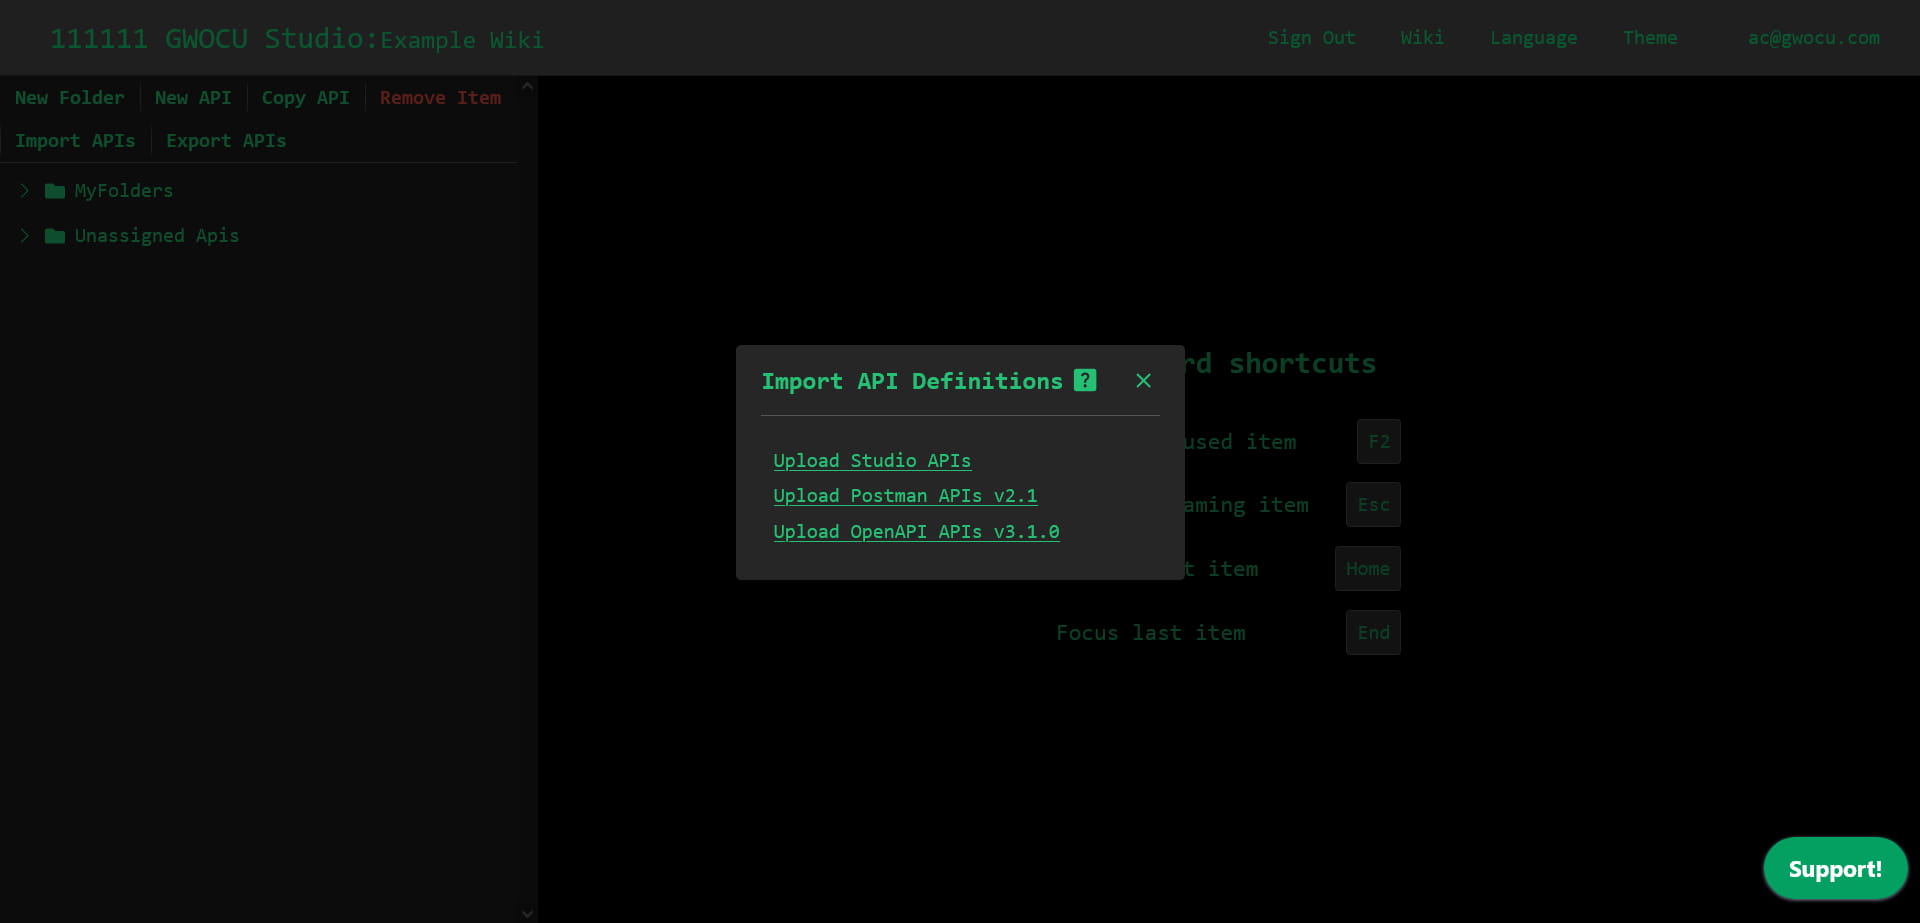
To import APIs into the workspace from another workspace, OpenAPI documentation, or a Postman collection:
- Open the API Manager page by clicking here or on the API Manager toolbar button on the home page.
- Click the Import APIs toolbar button.
- Choose the input format of your file.
- Select the file to import. If API definitions with the same name already exist, the imported file will overwrite them.
- Click Upload to proceed. A progress bar will indicate the progress, and an alert will confirm that the APIs have been imported. The imported APIs will appear at the end of the Unassigned APIs folder.
¶ Organizing APIs into folders
New APIs are stored in the Unassigned APIs folder by default, however you can create folders to group and organize your APIs as your collection grows.
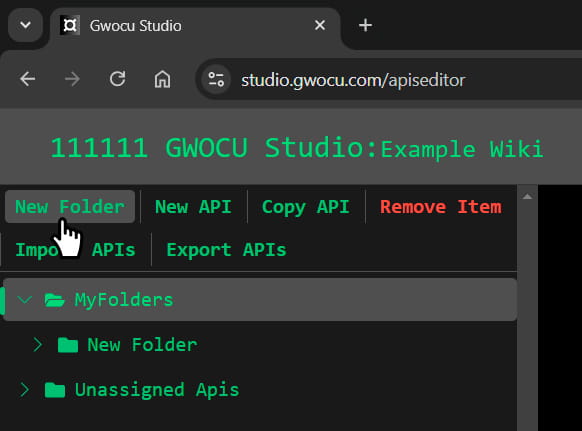
¶ Create folders
To create a folder:
- Choose a parent location. By default, all folders are created at the root level, but you can create new folders within any folder, except Unassigned APIs.
- Click the New folder toolbar button.
The new folder will appear as the last item in the chosen location.
¶ Rename folders
Folders are assigned generic names by default. You can rename all folders except MyFolder and Unassigned APIs, which are system folders. Folder names must be unique. There are two ways to rename a folder:
¶ Using the keyboard
- Click on the folder you want to rename and press
F2. - Enter the new name.
- Press
Enteror click outside the input field to save the changes.
¶ Using the "More options" menu
- Hover over the folder to reveal the More options button.
- Click the button to open the menu.
- Select Rename.
- Enter the new name.
- Press
Enteror click outside the input field to save the changes.
¶ Drag and drop APIs and folders
You can drag and drop APIs into any other folder, and drag and drop folders into other folders except for the Unassigned APIs one.

¶ Copy APIs
Create copies of an API while preserving all its original data except for the name. There are 2 ways to copy an API:
¶ Using the API Manager toolbar
- Click the API item you want to duplicate.
- Click the Copy API toolbar button.
An alert will confirm the API has been copied to the Unassigned APIs folder, where it will appear as the last item.
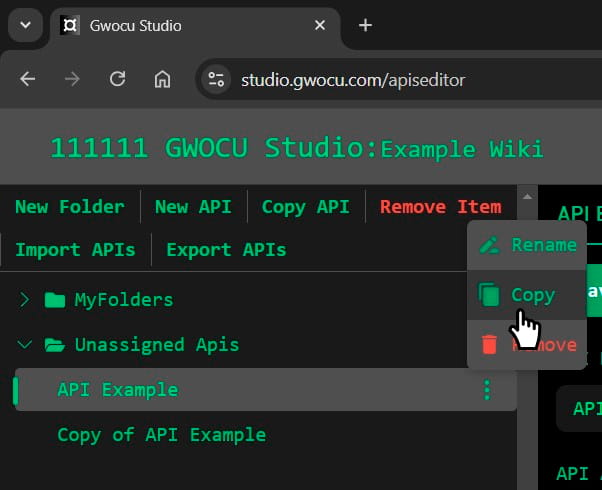
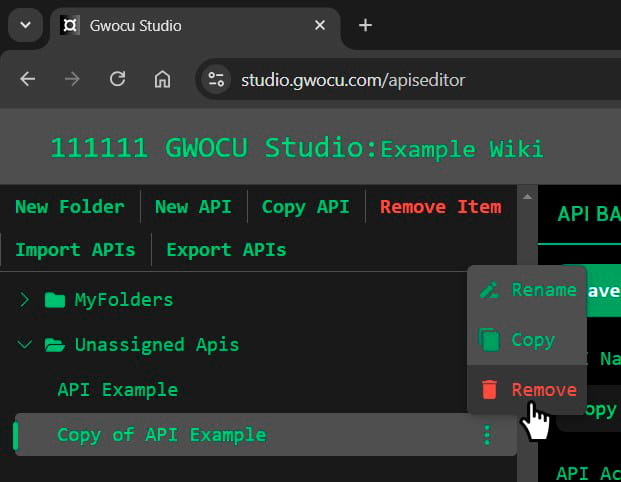
¶ Using the "More options" menu
- Hover over the API to reveal the More options button.
- Click the button to open the menu.
- Select Copy.
An alert will confirm the API has been copied to the Unassigned APIs folder, where it will appear as the last item.
¶ Remove APIs
There are 2 ways to remove an API:
¶ Using the API Manager toolbar
- Click the API you want to remove.
- Click the Remove Item toolbar button.
¶ Using the More options menu
- Hover over the API to reveal the More Options button.
- Click the button to open the menu.
- Select the Remove option.
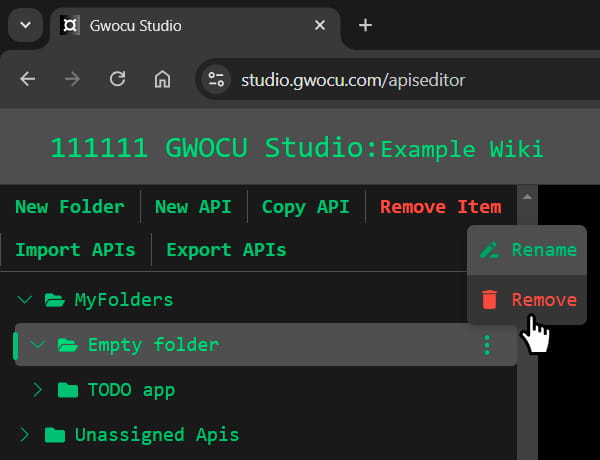
¶ Remove Folders
You can remove all non-empty folders, except for the system folders (MyFolders and Unassigned APIs), using the same methods as removing an API:
¶ Using the API Manager toolbar
- Click the folder you want to remove.
- Click the Remove Item toolbar button.
¶ Using the "More options" menu
- Hover over the folder to reveal the More Options button.
- Click the button to open the menu.
- Select the Remove option.
¶ Export APIs
Export APIs as OpenAPI definitions or as StudioAPI files for importing into other workspaces, using their documentation, or working with them in other REST clients. To expor APIs:
- Open the API Manager page by clicking here or on the API Manager toolbar button on the home page.
- Click the Export APIs toolbar button. A modal like this will appear:
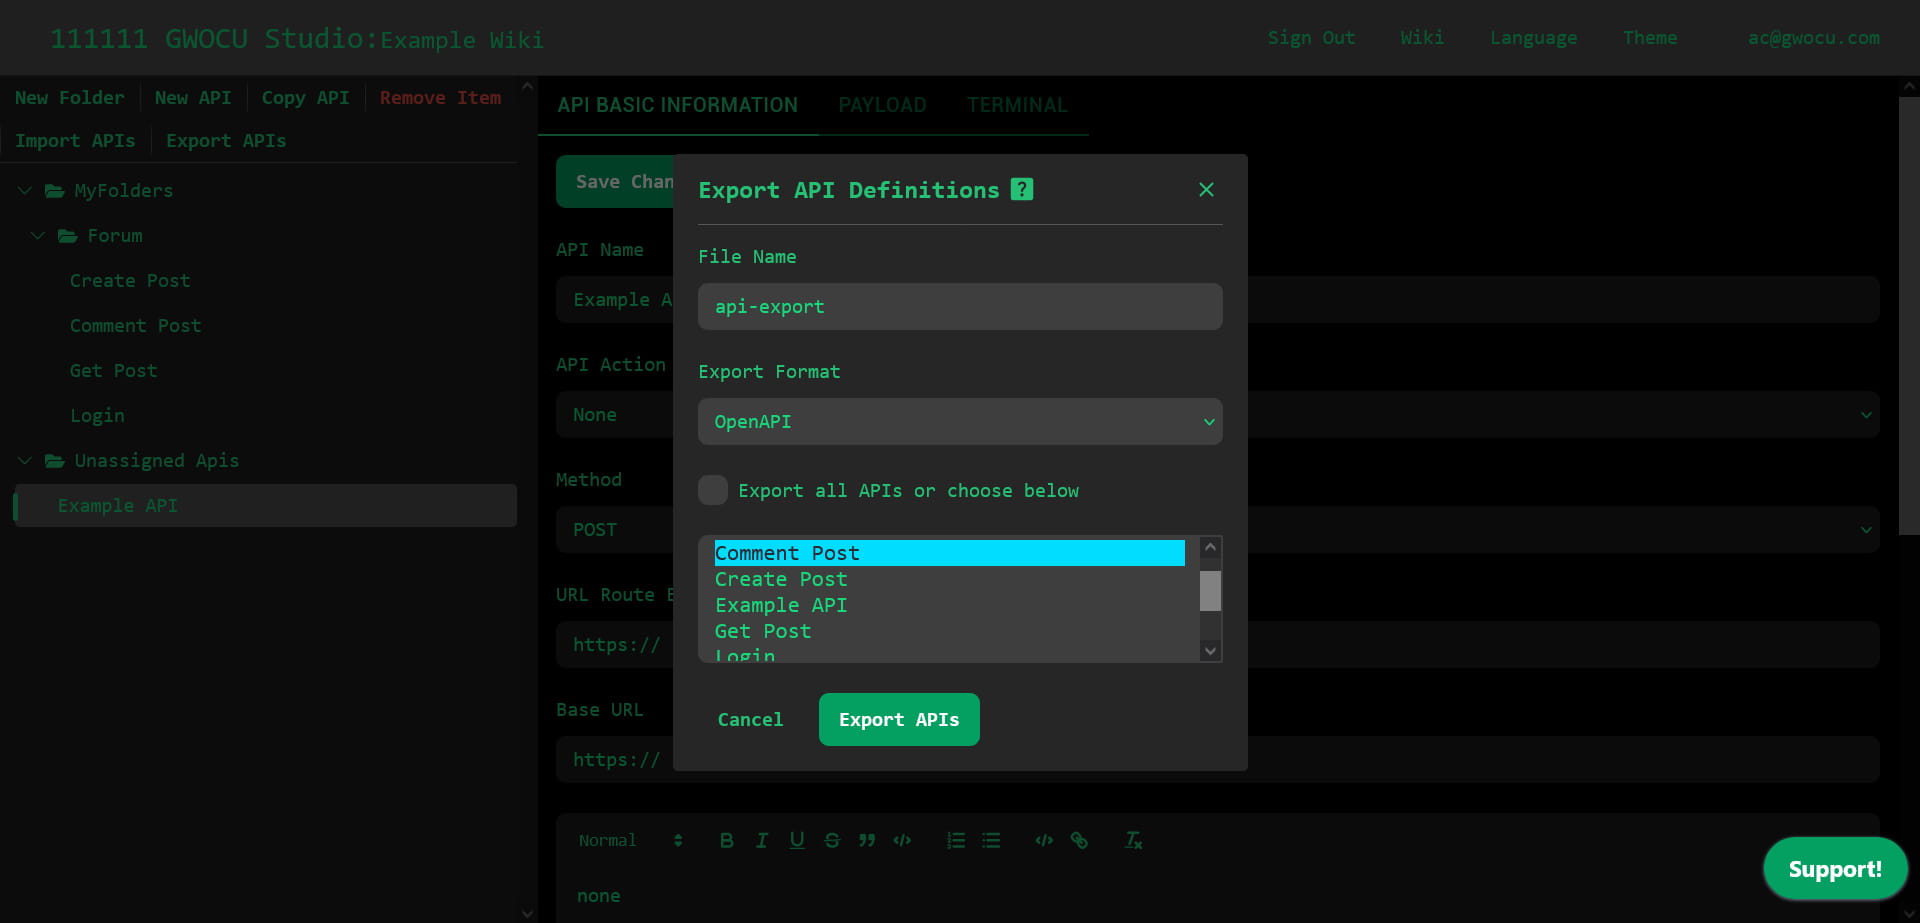
- Set a name for the output file. The file name can help with versioning.
- Choose an output file format (OpenAPI or StudioAPI).
- Select the APIs to export or check Export all APIs or choose below to export all available APIs. Use
Shiftto select a range of APIs orCtrl(orCmdon Mac) to select multiple APIs individually. - Click the Export APIs button. All chosen APIs will be exported and downloaded to your device as a single YAML file.